BHA and Bit Data
Interactive
Well Site > Available
Daily Operations Data
The BHA Runs form is used
to build the components that make up the BHA, including the drillstring
and bit. In addition, this form also records operation performance information.
Typically, a BHA Run is an
event that begins when a drillstring is run down the hole and ends when
the drillstring is changed or pulled out of the hole.
Note:
Deleting a BHA Run will delete the run,
assembly string, associated components, and all operations (Bit and BHA).
BHA and Bit data is recorded
from the surface and Daily
Operations link or by selecting the on the subsurface canvas.
The BHA and Bits form allows
the user to add, review, modify and delete BHA and Bit data on a daily
basis.
WARNING! Before
a new BHA or Work String can be added, any previous BHA's or Work Strings
MUST be pulled. This means their Date/Time
Out and MD Out fields
must be entered. If these values are not entered, the following message
will appear, "The previous drillstring/work string has to be pulled
out before you can add a new one."
This form includes two spreadsheets.
The BHA Runs spreadsheet
is used to:
run and pull
the BHA
define the components
that make up the BHA (including the Bit)
For easy viewing
of bits, the Bit component entered
with each BHA Run is also displayed in a separate spreadsheet. Each
Bit in the Bits spreadsheet is connected to a BHA Run in the BHA Runs
spreadsheet.
The Bits spreadsheet can be used to:
record Bit operation
data
record a Bit prior to defining the
BHA Run
Wellbore Schematic Note:
Use the wellbore schematic, built into
the BHA Runs form, to verify the data being entered makes sense. Right-click
the schematic to magnify the image.
BHA and Bit Data can be entered using a number different
workflows. The following topics outline two of these workflows.
Special Fields and Functions
Some fields on this form are automatically populated
from data entered in areas of the application, involve calculations performed
by OpenWells® software or have other significant features.
Copy To Library Button
This button allows drillstrings to be added
to a library, where they can be used later to create new BHA Runs.
Select the row to be copied and click the
Copy To Library button.
The Save
String to Library dialog appears.
Enter a String
Name that clearly identifies the selected BHA string and click
OK.
The string is now available to be copied
from the Library.
Copy from Library
Prior to using this button, all drillstrings
must be pulled.
The Copy
from Library button copies a drillstring selected from the library
to the current BHA Run Summary spreadsheet. When this button is selected
the Select String from Library
dialog appears.
Select the desired drillstring and click
OK.
A new BHA Run Summary row is added
to the spreadsheet containing following data from the original BHA:
the BHA
No is a combination of the word "Copy and the name of
the original BHA No,
the String
Type (defined by the name of the Library item,
the current
report date and the report date end time,
components of
the original BHA.
Edit these fields to correctly reflect the
name of the BHA going into the Well and the date and time the BHA run
took place.
Note:
The Component Lengths most likely need
to be altered when a drillstring is copied from the library.
Copy Previous Button
Prior to using this button, all drillstrings
must be pulled.
The Copy
Previous button copies a previously entered drillstring or planned
drillstring into the BHA Run spreadsheet.
When this button is selected the Select
Assembly String dialog appears.
Use the Select
Existing String to Copy tab to access a BHAs recorded in EDM or
use the Select Planned String to Copy
tab to access a planned or prototype BHA recorded in EDM.
Navigate to the Wellbore containing the drillstring
to be copied using the Well Explorer tree or click the Well List tab at
the bottom of the dialog to select by well name and wellbore name.
Select the Wellbore. A list of BHAs recorded
for the selected Wellbore appears.
Select the BHA to be copied and click OK.
The selected BHA is copied into the BHA Runs
spreadsheet.
Edit the BHA
No and Date/Time In fields
to accurately reflect the new BHA Run.
MD In and Date/Time In
The MD In
and Date/Time In fields define
the depth and time at which the string is run "downhole".
The Date/Time
In field automatically populates based on the date of the Daily Report date and the selected for the Company (see Company
Properties). For all subsequent rows, the Date/Time
In field will be automatically populated with the data entered
in the Date/Time Out field in
the previous row.
MD Out and Date/Time Out
The MD Out
and Date/Time Out define the work
string as pulled.
Note:
Before a new row can be added any Work
String or Drillstring spreadsheets, the Date/Time
Out and MD Out fields for the previous row must be entered.
If these are not entered, the following message will appear, "The previous BHA/Work String has to be
pulled out before you can add a new one."
Catalog Button
The Catalog button is used to select a component
from a compiled list of available components and their properties. For
more information, see the Catalogs
topic.
Flip BHA Button
In the event that a string's components have
been entered in the wrong order (e.g., top to bottom instead of bottom
to top), the Flip BHA button allows
a user to quickly fix this mistake and reverses the entry order of the
components.
Move Up and Move Down Buttons
The move up and down buttons allow users
to change the order of individual components. To change the order, select
the component row and click the Move
Up or Move Down button
until the component is in the correct position in the spreadsheet.
Components (Enter Top to Bottom) Label
The direction in which components must be
added to the Components spreadsheet is defined in the Components (Enter
Top to Bottom) text. The direction displayed is defined in the Form's
WYSIWYG XML file.
Running and Pulling a BHA in the OpenWells® application
In the OpenWells application:
a BHA is considered
downhole when both the MD In
and Date/Time In have been
entered
a BHA is considered
"pulled" when both the MD
Base and Date/Time Out
have been entered
only one BHA
or Work String can be run "downhole" at a time
Show Hide Buttons
The Show
 Hide
Hide
 buttons are used to expand or collapse
a data area. This feature allows users to view the entire details of a
spreadsheet row or just the summary row.
buttons are used to expand or collapse
a data area. This feature allows users to view the entire details of a
spreadsheet row or just the summary row.
For example, in BHA and Work String spreadsheets
these buttons show and hide string components.
In the Costs spreadsheet these buttons show
and hide daily cost details.
In the surveys spreadsheet, these buttons
show and hide survey readings.
BHA Number
The BHA No. field is used to identify the
BHA Run. For example, the BHA number can increment by one every time any
component is changed. Individual Companies have their own rules for the
BHA number.
MD In
The MD In defines the beginning depth at
which the string begins the intended function.
Date/Time In
The Date/Time In defines the date and time
the drillstring begins to enter the Well. When a new BHA is added, OpenWells
automatically sets the Date/Time In
field to one second after the previous BHA was pulled.
MD Out
The MD Out defines ending depth at which
the string ends its intended function.
The drillstring is defined as "pulled"
when the Date/Time and MD Out fields are completed.
Date/Time Out
The Date/Time Out defines the date and time
the drillstring is removed from the Well or component change out is complete.
The drillstring is defined as "pulled"
when the Date/Time and MD Out fields are completed.
BHA Length
The BHA Length is calculated as follows:
BHA
Length = ∑ all Component Lengths
- the Drill Pipe Component Length at the top of the string
Note: If
the first spreadsheet row (i.e., the top of the string) is "Drill
Pipe" then it is not included in the calculation.
Drag
The Drag field is calculated as follows:
Drag
= String Wt Up - String Wt Rot
Footage
Footage is the amount of hole drilled since
the BHA operation. This field is calculated as follows:
Footage
= MD (of current BHA operation) - MD (of previous BHA operation)
ROP
The ROP field is calculated as follows:
ROP
= Footage / Drilling Hours
Cum Drilling
The Cumulative Drilling (hours) field is
calculated as follows:
Cum
Drilling = ∑ Drilling Hours for
all BHA Operations for the current Drillstring
Cum Circulating
The Cumulative Circulating (hours) field
is calculated as follows:
Cum
Circulating = ∑ Circulating Hours for all BHA Operations for the current
Drillstring
Cum String
The Cumulative String (hours) field is calculated
as follows:
Cum
String = Cum Drilling + Cum Circulating
MD Top
The MD Top defines the top measured depth
of the component. This field is calculated as follows:
For the first row, the value in the Top field
is 0.0 based on the Depth Reference selected at the time the row was created.
If the Depth Reference is changed the Top depth changes to reflect the
new Depth Reference selected.
For all subsequent
rows: Top = Previous MD Base
MD Base
The MD Base field defines the bottom measured
depth of the component. This field is calculated as follows:
MD
Base = Top + Length
Section Type and Component Type Picklists
For each component, select the Section
Type and Component Type
from the picklists.
Some component Section
Types are supported by EDM™ catalogs. When these component types
are selected, a Catalog Selection
dialog appears enabling the user to select the component. The command defines if a catalog is automatically
opened when the Section Type is selected. By default, the Auto Catalog
Select option is active. Alternatively, select the Catalog
button for the currently selected Component row.
Component Specific Details Link
Click the Details
link to add or modify the details of the currently selected component
in the Component's Details dialog.
File Attachment Support (  )
)
The Components spreadsheet allows for one
or more files to be attached to a row in the spreadsheet.
To attach a file to a row in the spreadsheet,
left-click the cell in the (Attachment) row and select
New.... The dialog appears that allows
the user to attach a document to the cost item. For more information see
the Using
Attachments in Spreadsheets topic.
MD Top
The MD
Top displays the top depth of the component.
MD Base
The MD
Base field is calculated by adding the Length
of the string component to the MD Top.
Top Set
The Top
Set of the component is calculated by adding the lengths of the
previous components to the MD Top.
Bit Operations Calculations
Flow Rate
The Flow Rate field is populated by the Pump
Operations Output as follows.
Using the last operation entered for each
pump, the total Output value is pushed to the Flow Rate in the Bit Operations
tab for all types excluding the Slow Pump code.
For example, in Pump Operations you have three pumps as follows:
Pump
#1
Pump Operation
#1 – Slow Pump – Output = 137
Pump
Operation #2 – Drilling - Output = 267
Pump
#2
Pump
Operation #1 – Slow Pump – Output = 125
Pump
Operation #2 – Slow Pump- Output = 110
Pump
#3
Pump
Operation #1 – Slow Pump – Output = 132
Pump
Operation #2 – Drilling - Output = 256
Pump
Operation #3 – Circulating - Output = 242
This will update
the Bit Operation/' Flow Rate to 509 (last Pump Operation of Pump #1 plus
last Pumps Operation of Pumps # 3).
This feature is controlled by the EDM System Setting SlowPumpCode.
P Bit (Pressure Differential)
P Bit is the pressure differential or loss
across the bit.
The equation for P Bit and derivation of
the coefficient used in the equation are provided below:
Dp = r ´
Q2 / (2 ´
Cd2
´ A2)
Where:
Dp
= pressure drop across bit (psi or kPa)
r
= fluid density (ppg or kg/m3)
Q
= flow rate (gal/min or L/min)
Cd = jet discharge coefficient
A
= total flow area (in2 or mm2)
Note:
Cd
is a dimensionless coefficient. It may be as high as 0.98, but most resource
materials recommend using the conservative figure of 0.95. The following
value is used in OpenWells® software for this calculation:
Cd
= 0.95
The 2 ´ Cd2
factor is integrated into the conversion constant. Therefore, the intermediate
calculation is just r ´
Q2/A2. This results in an intermediate result
of:
For API: lbs
´ gal/(min2 x in4)
For SI: kg ´ L2/(m3
x min2 x mm4)
Therefore for
API, convert lbs ´ gal/(min2
x in4) to psi:
Note:
For the API calculation, convert
pounds to a mass by dividing by the acceleration due to gravity. This
is the "(lbs2/386.04in)"
factor you see in the following conversion.
lbs
x gal/(min x in4) ´
(231 in3/1 gal) ´
(1min2/3600s2) ´
(lbs2/386.04in )= 1/6016.20779221 psi
Now the denominator (6016.20779221) is multiplied
by 2 ´ Cd2
to get 10859.2550649.
In SI, convert kg ´L2/(m3
x min2 x mm4) to kPa:
kg
´ L2/(m3
´ min2 ´
mm4) ´ (10-6m6/1L2)
´ (1012mm4/1m4) ´ (1min2/3600s2)
´ (1kPa/1000(kg/(m ´
s2))) = 1/3.6 kPa
The denominator (3.6) is now multiplied by
y 2 ´ Cd2 to
get 6.498
Noz Vel (Nozzle or Jet Velocity)
The calculation of Nozzle Velocity (nozzle
or jet velocity) and derivation of the constant used in the calculation
are provided below:
v = Q / A ´
const
Where:
v = velocity (ft/s or m/s)
Q
= flow rate (gal/min or L/min)
A
= area (in2 or mm2)
The intermediate result of the calculation
is as follows:
For API: gal/(min x in2)
For SI: L/(min x mm2)
Therefore for API, convert gal/(min x in2) to ft/s:
1 gal/(min x in2)
x (231 in3/gal) x (1min/60s)
x (1 ft/12 in)=0.32083333333333 ft/s
Therefore for SI, convert L/(min x mm2) to m/s:
1 L/(min x mm2)
x (0.001m3/L) x (1,000,000mm2/m2)
x (1min/60s)=16.6666666667 m/s
HHP (Hydraulic Horsepower)
The calculation of HHP, or hydraulic horsepower
and derivation of the constant used in the calculation are provided below:
hp
= Q ´ p / const
Where:
hp = horsepower (HP or kW/cm2)
Q
= flow rate (gal/min or L/min)
p = pressure drop (lbs/in2 or kPa)
const = conversion factor to change (min/in2)/(gal/lbs)
to horsepower
The intermediate result of the calculation
is as follows:
For API: (gal x lbs)/(min x in2)
For SI: (L x kPa)/min
Therefore for API, convert (gal x lbs)/(min
x in2) to HP:
1 (gal x lbs)/(min x in2)
x (231in3/gal) x (1ft/12in)
x (33000HP/(1ft x lbs/min))=1/1714.28571429 HP
For SI, convert (L x kPa)/min to kW:
1 (L x kPa)/min x (1000(N/m2)/1kPa)
x (0.001m3/L) x (1 min/60sec)
x (1kW/1000 (N x m/s))=1/60000 kW
Note:
Standard API documentation usually rounds
this number to 1714. In OpenWells, this calculation is left as precise
as possible so that there will be little or no discrepancy between what
is calculated for different unit sets.
HHP/Area (Bit Hydraulic Horsepower per Bit Area)
The calculation of HSI, or bit hydraulic
horsepower per bit area, is provided below:
HSI
= hp / A
Where:
HSI = HHP/in2
hp
= horsepower (HP or kW/cm2)
A
= total flow bit cross sectional area (in2
or mm2)
Impact Force
The calculation of Impact Force is provided
below:
Impact
Force = (p / gc) VQ
Where:
Impact Force = measured in lbf
p = Density of Fluid (lb/ft3)
gc
= Gravitational constant, 32.17 ft/sec2
Q = Circulation rate (ft3/sec)
V = Velocity through the bit (ft/sec)
Units Picklist 
The Unit Management System in the EDM™ database
controls display units in EDT™ applications. Every numerical element in
the EDM database has a storage measure (some known quantity in the physical
world) associated with it such as feet, ft/sec, or °F.
In OpenWells® software, Active Viewing Units
(or Display Units as they are sometimes referred to) are for presentation
purposes only. Display units can changed at any time and do not affect
the quality of the data.
Active Viewing Units for the OpenWells application
are selected from the Unit picklist
located at the top of each page.
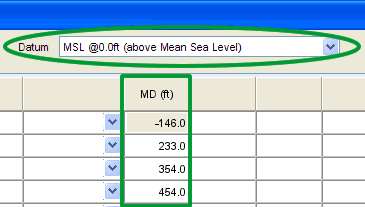
Datum Selector 
The reference point for depths changes over
the life cycle of a Well, with changes in rigs and viewing data requirements.
The Datum Selector, located at the top of
each page, allows users to change displayed the depth reference point
(datum) on the fly.
Changing the depth reference point displays
depths relative to the datum selected. This DOES NOT change the values
in the database itself.
Data MUST be
entered correctly in context to the selected datum reference point.
The following example shows how the viewing
datum affects the data you see.

Print Page 
The Print Page button allows users to print
the current page as it appears in the window.